
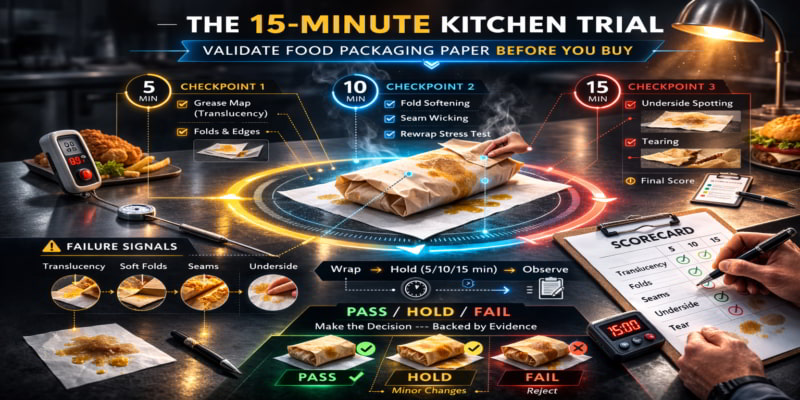
📌 Key Takeaways
A 15-minute kitchen trial reveals whether food packaging paper actually works under real service conditions—specefication sheets alone cannot.
- Test Before You Commit: Run wrapped food through a timed trial with your greasiest menu item before signing any bulk contract with a new supplier.
- Use the Same Setup Every Time: Keep the menu item, wrapping method, heat source, and holding conditions identical so you can fairly compare different vendors.
- Check at 5, 10, and 15 Minutes: Look for grease bleed-through, soft folds, torn edges, and spots on the surface beneath—these signals show barrier failure.
- Score Every Vendor the Same Way: A simple Pass, Hold, or Fail rating at each checkpoint gives procurement and quality teams shared, defensible data.
- One Good Test Isn’t Enough: Run trials twice per vendor, from different parts of the roll, because one lucky sample can hide inconsistent quality.
Watch the wrapper survive your kitchen before trusting the specification sheet.
Food service operators and procurement teams qualifying new packaging suppliers will gain a repeatable validation method here, preparing them for the detailed protocol that follows.
~ ~ ~ ~ ~ ~ ~ ~ ~ ~ ~ ~ ~ ~ ~ ~ ~ ~
Why 15 Minutes Beats 15 Pages of Specifications
“I have a new vendor quote but I’m afraid to sign a 6-month bulk contract without knowing if the paper actually works.”
That hesitation is rational. The quote lands on your desk. Pricing looks competitive. The specification sheet lists the right GSM, the right Kit Level, the coating you requested. Everything checks out—on paper.
But there’s a question that won’t go away: What happens when this wrapper meets a double cheeseburger at minute eight of a lunch rush?
Minute 8 to 12 is where the truth shows up. Softening at folds. Dark grease “maps” bleeding through. A corner tear that turns into a customer-facing mess. Specification sheets describe what paper should do under laboratory conditions. Your kitchen reveals what it actually does when grease renders, steam builds, and wrapped product sits under a heat lamp while the drive-through queue stretches to the street.
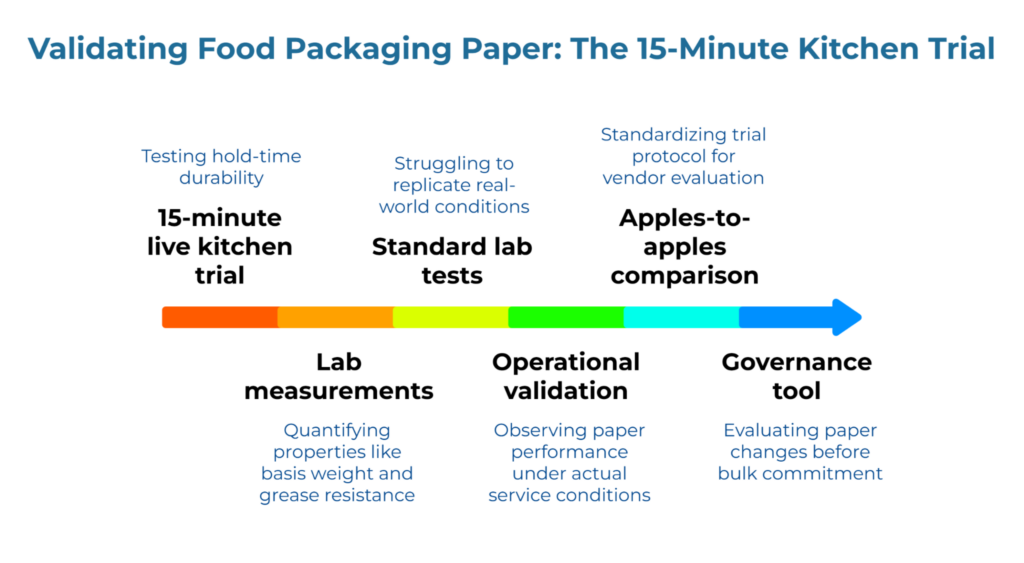
A 15-minute live kitchen trial is the only reliable test method for testing food packaging paper hold-time durability. Lab measurements quantify properties like basis weight and grease resistance rating for materials such as food grade kraft paper and coated substrates. Standard lab tests often struggle to perfectly replicate the specific combination of heat, fat content, humidity, and time that your menu items create. Generally, operational validation—observing the paper perform under your actual service conditions—provides the most reliable and cost-effective answer.
This trial bridges the gap between laboratory specifications and real-world friction. GSM tells you how heavy the paper is, not how it will behave when folded around a hot, greasy sandwich. A Kit Level rating indicates grease resistance under standardized test conditions, but your fried chicken sandwich creates different stress than the test protocol.
The rule is simple: never sign a bulk contract on a paper specification you haven’t watched survive a live 15-minute hold.
Think of the relationship between specifications and trials like blueprints and flight tests. The specification sheet is the engineering drawing. The kitchen trial is the moment the aircraft leaves the ground.
Standardizing this trial protocol enables something procurement teams rarely achieve: apples-to-apples comparison of vendors. When every supplier’s paper faces the same menu item, the same wrap technique, the same holding conditions, and the same evaluation criteria, the results speak clearly. One vendor’s paper holds up. Others don’t. The decision becomes objectively justifiable.
This protocol also functions as a governance tool within food-grade packaging paper supplier qualification frameworks for multi-unit food operations. It helps QA and Procurement evaluate a paper change before a long bulk commitment locks in a specification that fails in service.
What follows is a checklist and scorecard that produces a clear outcome—PASS, HOLD, or FAIL—along with the vendor decision that follows from each.
Operational Validation Blueprint: Sequential Verification Checklist
Setup: Make the Trial Comparable
A trial that changes variables mid-test produces unusable data. Before starting the clock, lock down every controllable factor.
Menu item selection: Choose the same item for every vendor’s paper. Select the product that stresses wrappers hardest—typically your greasiest or hottest menu item. If fried chicken causes the most wrapper failures in service, test with fried chicken.
Wrap and fold method: Use the exact technique your line staff uses during service. If different employees fold corners differently, standardize on one method for the trial. Document it. A wrapper that fails with a tight three-corner fold might pass with a loose envelope fold, but the comparison only matters if the technique stays constant.
Heat state at wrapping: The product should enter the wrapper at normal serving temperature. Testing with cooled products produces different results than testing with products fresh from the line.
Holding environment: Use the same warming drawer, heat lamp, or ambient shelf for every test. Comparing one vendor’s paper under a heat lamp to another’s on a room-temperature counter invalidates the comparison entirely.
Sample selection: Pull multiple wraps from different positions in the roll or stack. Paper properties can vary across a production run. Testing three to five wraps per vendor establishes a pattern rather than capturing a single fluke result.
Role assignment: Assign two distinct roles to maintain consistency and objectivity. The Runner—typically an operations lead—wraps exactly as the line does during service. The Recorder—usually someone from QA or procurement—logs observations at each minute mark using a consistent scoring method. Separating these responsibilities prevents technique drift and ensures documentation stays current.
Temporal Checkpoints: Observations at 5, 10, and 15 Minutes
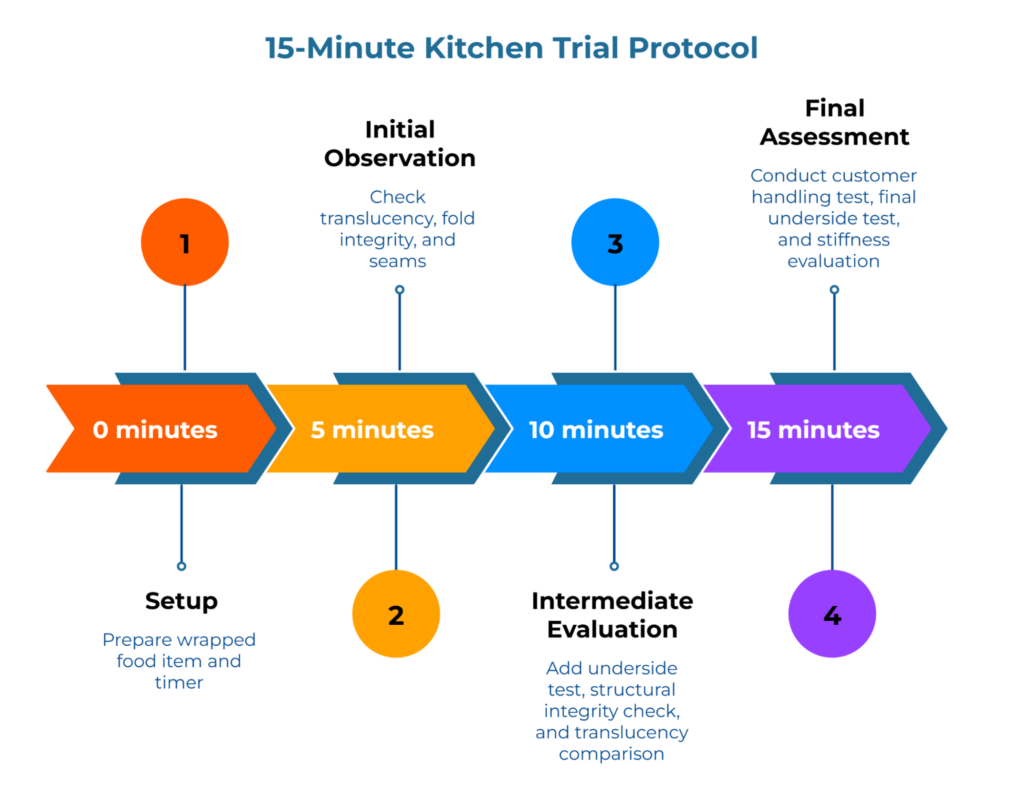
Set a timer. At each checkpoint, observe specific indicators and record findings. A simple scoring approach works well: 0 indicates no issue observed, 1 indicates a minor issue, 2 indicates a significant problem. Alternatively, score each criterion directly as PASS, HOLD, or FAIL.
Do not “peek” early and adjust technique. The discipline is part of what makes the result audit-proof.
At the 5-minute mark, evaluate:
Visual translucency is the first signal. Hold the wrapped item toward a light source. Dark, wet-looking patches forming an “oil map” indicate grease migration through the barrier. Note the size and location of any translucent areas.
Fold integrity matters early. Press lightly on a folded edge or crease. Paper that maintains its fold is performing. Paper that has gone soft or limp at the fold line is already weakening.
Check seams and edges where paper overlaps. Grease wicking along an edge—visible as a dark line spreading outward from the seam—signals barrier weakness at stress points.
At the 10-minute mark, add these checks:
The underside test provides direct evidence of barrier failure. Lift the wrapped item and place it on a clean white paper liner, paper napkin, or tray. Wait 30 seconds, then examine the liner. Grease spots on the liner mean the barrier has failed completely in those areas.
Assess structural integrity by handling the wrap as staff would during service. Can the item still be picked up without the paper tearing at stress points? Note any tears, holes, or significant weakening.
Compare translucency to the 5-minute observation. Has the oil map expanded significantly? Rapid spread suggests the barrier is degrading faster than hold-time requirements allow.
At the 15-minute mark, conduct final evaluation:
Handle the wrap as a customer would. Gentle pressure at folds and pinch points reveals whether the paper tears under normal end-use conditions.
Perform one final underside liner test. Spotting that appears only at minute 15 tells you the paper’s effective hold-time limit falls somewhere between 10 and 15 minutes—useful information even if the overall result is marginal.
Assess overall stiffness. Food packaging paper should still feel like packaging at the end of the hold window. Paper that feels like wet tissue has lost structural integrity regardless of whether the barrier held.
Record every observation in a consistent format. A table structure works well: Vendor, Date, Menu Item, Checkpoint, Criterion, Score, Notes.
Stress the Paper Like Rush Hour Does
Some operations involve re-handling wrapped products—unwrapping to add condiments, re-folding for bagging, stacking items in a delivery container. If this describes your service model, add a handling stress step to the trial.
After the 10-minute checkpoint, unwrap the item and re-wrap it using standard technique. This simulates the friction that occurs during actual service. Note whether the paper tears during re-handling, whether creases weaken faster after being re-folded, or whether barrier integrity degrades more rapidly after the handling stress.
This step is particularly relevant for delivery-focused operations where wrappers may be touched multiple times between the kitchen and the customer. The goal is not to torture-test the paper; it is to mirror the conditions that create customer complaints and rewrap waste.
The Decision Rule at Minute 15
Convert observations into a single outcome that drives a clear next action.
- PASS means no significant issues appeared at any checkpoint. The barrier remained intact, structural integrity held, and the underside test showed no spotting. This specification is approved for pilot rollout. Proceed to a small-batch order to confirm consistency across a larger sample before committing to a bulk contract.
- HOLD means minor issues appeared that might be acceptable with a specification adjustment. Examples include slight softening at minute 15 without tearing, or minor translucency without bleed-through to the underside. A HOLD result calls for requesting a barrier upgrade, different coating, or adjusted GSM from the vendor, then re-running the trial with the revised specification.
- FAIL means significant problems appeared before the 15-minute mark. Underside spotting at minute 10, tearing at folds during handling, or structural collapse (loss of stiffness) constitute failure. Reject this specification for this application. Document the specific failure mode so the vendor understands why.
The outcome determines the next step:
- PASS → Approve for pilot; proceed to small-batch order
- HOLD → Request specification change; schedule re-test
- FAIL → Reject vendor for this application; document failure mode
How to Score and Compare Vendors with Your Trial Results
The Scorecard That Procurement and QA Can Both Sign
Without a standardized scorecard, vendor comparison relies on memory and impression. With one, comparison relies on documented data collected under controlled conditions.
A one-page comparison scorecard captures what matters. Use this template and adapt the fields to your operation:
| Field | Vendor A | Vendor B | Vendor C |
| Date / Location | |||
| Menu item tested | |||
| Holding environment | |||
| Wrap method used | |||
| Sample notes (roll/stack positions) | |||
| Minute 5: translucency | |||
| Minute 5: softening at folds | |||
| Minute 5: seam/edge bleed | |||
| Minute 5: underside spotting | |||
| Minute 5: tear initiation | |||
| Minute 10: translucency | |||
| Minute 10: softening at folds | |||
| Minute 10: seam/edge bleed | |||
| Minute 10: underside spotting | |||
| Minute 10: tear initiation | |||
| Minute 15: translucency | |||
| Minute 15: softening at folds | |||
| Minute 15: seam/edge bleed | |||
| Minute 15: underside spotting | |||
| Minute 15: tear initiation | |||
| Final result (PASS/HOLD/FAIL) | |||
| Decision (approve / request change / reject) | |||
| Notes / anomalies |
Include a notes field for anything unusual—a product batch that ran hotter than normal, a paper sample from the edge of the roll, any deviation from standard conditions. These notes prevent false conclusions later.
When both Procurement and QA sign the same scorecard based on the same observed results, the selection remains robust under internal scrutiny. The choice rests on evidence, not preference. Vendor conversations also become cleaner: the feedback shifts from “it felt worse” to “it failed at minute 10 on seam bleed and underside spotting under defined conditions.”
Avoid These Interpretation Traps
These mistakes create bad decisions even when the protocol is sound:
A single passing result does not establish consistency. Run the trial at least twice per vendor, ideally on different days or with different staff performing the wrap. One good result could reflect favorable conditions rather than reliable performance. The protocol requires multiple wraps from different roll or stack positions because consistency matters in service.
Changing wrap technique between vendors invalidates comparison. If Vendor A’s paper was tested with tight corner folds while Vendor B’s was tested with loose folds, the difference in results may reflect technique rather than paper quality. Standardize before testing.
Comparing results across different menu items requires caution. A fried chicken sandwich creates different stress than a grilled vegetable wrap. If operational needs require testing different items, document the difference clearly and avoid drawing direct vendor-to-vendor conclusions across item types. Compare Vendor A’s fried chicken result to Vendor B’s fried chicken result, not to Vendor B’s grilled wrap result.
How the Trial Connects to Broader Supplier Qualification
The 15-minute kitchen trial answers one specific question: does this paper perform under my service conditions? That question sits within a larger framework for qualifying food packaging paper suppliers.
Performance validation comes after specification selection. Before running a kitchen trial, the specification itself should match the menu’s requirements. The Menu-Match Matrix helps determine which menu items need higher grease resistance and what specifications to request. Understanding what a Kit Level measures ensures the initial specification request targets the right performance tier.
For operations that want to screen samples before committing to a full kitchen trial, a DIY oil drop test can identify obvious failures at the receiving dock.
Specification alignment also affects operational efficiency. When paper specifications match menu requirements, staff stop compensating for weak barriers by double-wrapping—a behavior that wastes material and slows service. The connection between proper specifications and portion control is directly impacted for operations concerned about packaging waste.
For menus where steam matters as much as grease, the choice between poly-coated and uncoated barriers influences trial outcomes. A paper that handles grease well but traps moisture may still fail a hold-time test due to steam-related softening.
The PaperIndex Academy provides resources for every phase of this qualification process.
Your Next Step in Paper Specifications Validation
The 15-minute kitchen trial functions as a governance mechanism. It replaces hope with evidence and transforms supplier transitions from gambles into calculated decisions.
The trial does not ask vendors to promise performance. It observes performance directly, under your conditions, with your menu, on your timeline. The result is a decision supported by documentation that Procurement, QA, and Operations can all reference.
This protocol validates operational performance: specifically, the substrate’s ability to maintain a functional barrier for 15 minutes. Compliance verification—confirming that food packaging paper meets food contact substance requirements under frameworks like EU Regulation 1935/2004—remains a separate and necessary step. Performance validation and compliance documentation serve different purposes; this protocol addresses the former.
When the trial protocol is standardized across your organization, vendor comparison becomes straightforward. Every supplier faces the same test. Results are comparable. Decisions are defensible.
From there, the path forward is clear: find suppliers whose specifications meet your requirements, then submit your buying requirements with your trial protocol and acceptance criteria attached.
Resources
- The Menu-Match Matrix for Food Packaging Paper
- What Is a Kit Level? The Simple Scale for Measuring Grease Resistance
- Testing Your Food Packaging Paper: A DIY Oil Drop Test
- Portion Control via Packaging: How Better Specifications Reduce Double-Wrapping Waste
- Poly-Coated vs. Uncoated: Choosing the Right Barrier for Hot & Steamy Foods
- TAPPI T 559 (Kit Test) — Grease Resistance Method
Disclaimer:
This content is educational and informational purposes only.
Our Editorial Process:
Our expert team uses AI tools to help organize and structure our initial drafts. Every piece is then extensively rewritten, fact-checked, and enriched with first-hand insights and experiences by expert humans on our Insights Team to ensure accuracy and clarity.
About the PaperIndex Insights Team:
The PaperIndex Insights Team is our dedicated engine for synthesizing complex topics into clear, helpful guides. While our content is thoroughly reviewed for clarity and accuracy, it is for informational purposes and should not replace professional advice.