
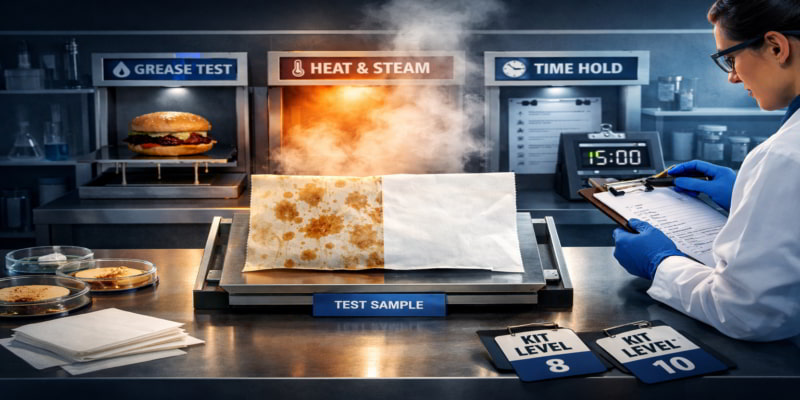
📌 Key Takeaways
Wrapper failures happen because paper meets stresses it wasn’t designed for—test your highest-risk menu items before they reach customers.
- Map Your Menu’s Stress Profile: Hot, greasy, steamy items define your minimum paper specifications—not the other way around.
- Compliance Doesn’t Equal Performance: A “food safe” certificate confirms safety, not whether paper survives fried chicken for 15 minutes.
- Kit Level Is Your Key Metric: TAPPI T 559 rates grease resistance 1–12; high-fat items typically need Kit 8 or higher.
- Run Kitchen Hold Trials: Lab tests matter, but wrapping real food for real hold times catches failures before customers do.
- Build an Audit-Ready Evidence Pack: Certificates are snapshots—track supplier changes and review documentation quarterly.
- Test the stress, not just the paper—your highest-risk item sets the floor.
Food service operators, QA managers, and procurement professionals sourcing food-grade packaging paper will find a practical testing framework below, preparing them for the step-by-step protocol that follows.
~ ~ ~ ~ ~ ~ ~ ~ ~ ~ ~ ~ ~ ~ ~ ~ ~ ~
Wrapper failures are rarely a mystery. There is usually a specification gap.
Start by identifying the top highest-stress menu items—hot, greasy, steamy, long hold, high handling. Map those items to a minimum validation set that includes a grease barrier measure (Kit test, TAPPI T 559) plus a fit-for-use kitchen hold trial. Then make the results comparable through conditioning and sampling, turn results into decisions with acceptance criteria, and archive evidence so it stays audit-ready.
Food-grade packaging paper testing protocols represent the systematic validation of packaging paper under the environmental stresses of commercial kitchens. This isn’t about collecting certificates. It’s about proving—before service—that wrappers will survive the conditions a menu actually creates.
Think of it like a stress test for a bridge. Engineers don’t simply confirm the steel meets code; they calculate the loads the bridge will carry, then test whether the structure holds under those specific conditions. Prove before traffic. Food packaging paper faces the same challenge. A compliance certificate confirms the paper—whether standard or food grade kraft paper—won’t leach harmful chemicals into food. It says nothing about whether that paper will hold together when wrapped around hot fried chicken sitting in a humid delivery bag for fifteen minutes.
Friday dinner rush. A line cook wraps a fresh batch of chicken tenders. The wrapping paper looks fine. Twelve minutes later, a customer opens their paper bag to find grease soaking through the wrapper, staining the outer food packaging paper, pooling at the bottom. The food is safe to eat—but the customer doesn’t see it as safe. They seem sloppy. The kitchen manager blames the supplier. The supplier points to the certificate. Nobody can identify the specification mismatch that caused the failure.
That scenario plays out because operations rely on generic compliance labels from unvetted food packaging paper suppliers instead of testing protocols matched to their menu. The fix starts by building a stress profile and a Menu-Match Matrix, then testing and locking the minimum specification plus evidence pack that prevents failures before they reach customers.
Defining Functional Failure Modes
Functional failure occurs when the material’s physical properties degrade before the point of consumption. This manifests as localized grease saturation (halos), tensile failure during unwrapping, or thermal softening.
Understanding failure modes creates shared language—and stops vague blame.
Grease-through occurs when oils penetrate the barrier layer—translucent spots appear, stains spread, oil pools on surfaces. Coating breakdown happens when heat or moisture separates the barrier from base paper. Softening results from moisture weakening fibres until the wrapper can’t support weight. Tearing comes from handling stress exceeding tensile strength. Odour transfer occurs when paper absorbs flavours or releases off-odours under heat. Delamination shows up when a barrier layer separates or degrades, sometimes appearing as staining that looks like contamination even when the paper remains compliant.
These failures don’t happen because someone bought defective paper. They happen because the paper encountered a stress it wasn’t designed to handle.
Commercial kitchens create what’s called the stress stack: the combination of heat at wrapping, aggressive oils from fried foods, steam from hot items, dwell time in holding areas, and physical handling through service. A wrapper performing perfectly with room-temperature pastries will fail with hot fried chicken—not because the paper changed, but because the stress profile is completely different.
Why “Food Safe” and “FDA Compliant” Aren’t Performance Claims
Many operations assume a “food safe” or “FDA compliant” label means the paper will work for their application. That assumption causes failures. Chemical compliance and functional performance answer different questions entirely.
| Chemical Compliance (Food Contact) | Functional Performance (Barrier + Strength + Fit-for-Use) |
| Confirms materials won’t migrate harmful substances into food | Confirms paper will resist grease, moisture, and handling under actual use conditions |
| Governed by FDA 21 CFR 176 (US) or EU Regulation (EC) No 1935/2004 | Measured by Kit Level, Cobb value, tensile strength, and fit-for-use trials |
| Tested under standardised laboratory conditions | Must be validated against specific menu stresses |
| Answers: “Is this material permitted for food contact?” | Answers: “Will this paper survive fried chicken for 15 minutes?” |
The mechanism of failure connects these two worlds. When paper is selected using the wrong barrier metric—or tested under conditions that don’t match the menu—hot oils find pathways through the paper. Once grease penetrates the barrier layer, it reaches base paper fibres. Those fibres absorb the grease and lose structural strength. The paper softens. More oil penetrates. Collapse accelerates.
Compliance documentation cannot substitute for performance validation. (Regulation (EC) No 1935/2004)
For a deeper explanation, see FDA vs. ISEGA for takeout food packaging paper.
Step 1 — Build a Stress Profile for Your Menu (the Menu-Match Matrix)
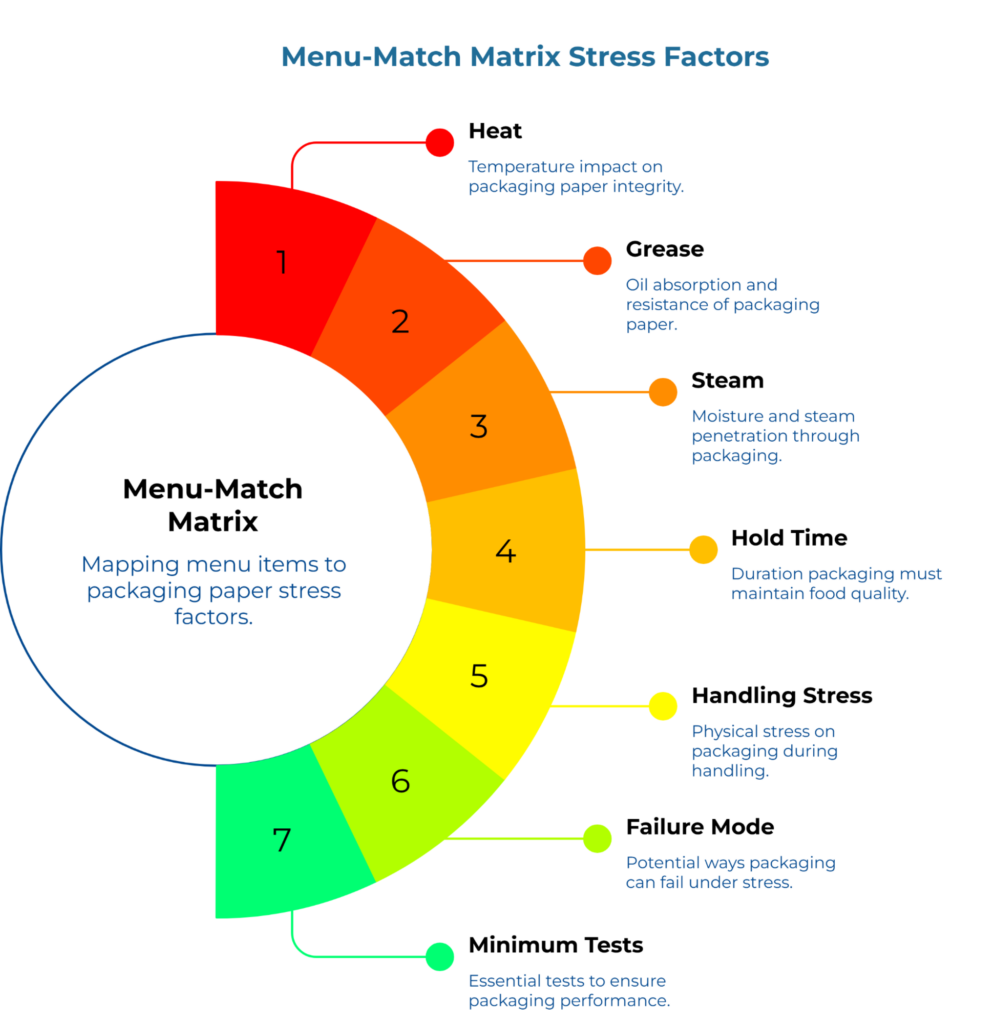
The failure of universal wrappers stems from the diversity of food stresses; a substrate optimized for dry pastries cannot simultaneously accommodate the moisture-rich, high-fat profile of fried proteins. A single paper specification cannot optimize for dry pastries, greasy fried chicken, and steaming hot dogs simultaneously. The solution is mapping what a specific menu demands.
The Menu-Match Matrix forces this analysis. For each menu item, document five stress factors: heat at wrap, grease load, moisture/steam, hold time, and handling stress—all rated low/medium/high. Then identify the likely failure mode and minimum validation tests needed.
Menu-Match Matrix: Food Packaging Paper Stress → Test Protocol Map
| Menu Item | Heat | Grease | Steam | Hold | Handling | Failure Mode | Min. Tests | Trial? | Pass/ Fail |
| Fried chicken | High | High | High | 15+ min | Med | Grease-through, softening | Kit Level (TAPPI T 559), basis weight (ISO 536), Cobb (ISO 535) | Yes, 20 min | No underside oil; no softening |
| Burger/sandwich | Med | Med | Med | 10 min | Med | Grease halo, softening | Kit Level, Cobb (ISO 535) | Yes, 15 min | No stain spread; holds shape |
| Breakfast wrap (eggs + cheese) | Med | Med | High | 20 min | Med | Softening, seam failure | Cobb (ISO 535), Kit Level (TAPPI T 559) | Yes, 20–30 min | No moisture ring; seam intact when lifted |
| Fries/sides | High | High | Med | 10 min | Low | Grease pooling | Kit Level (TAPPI T 559) | Yes, 12 min | No pooling at base |
| Steamed dumplings | Med | Low | High | 25 min | Low | Moisture soak-through | Cobb (ISO 535) | Yes, 20–30 min | No wet patches; no sticking |
| Pastry/bakery | Low | Low | Low | Varies | Low | Surface oil marks | Basis weight (ISO 536) | Optional | Clean presentation |
| Hot dog | High | Med | High | 5–10 min | Med | Steam softening | Cobb (ISO 535), wet tensile | Yes, 10 min | No sag; no tear at fold |
| Pizza slice | High | High | Med | 5 min | High | Grease-through, adhesion | Kit Level, release test | Yes, 8 min | Clean separation |
Keep stress ratings categorical (low/medium/high) rather than numeric to avoid inventing false precision. The highest-stress items define the minimum specification.
For a detailed walkthrough, see the menu-match matrix for food packaging paper.
Step 2 — Define the Minimum Test Set
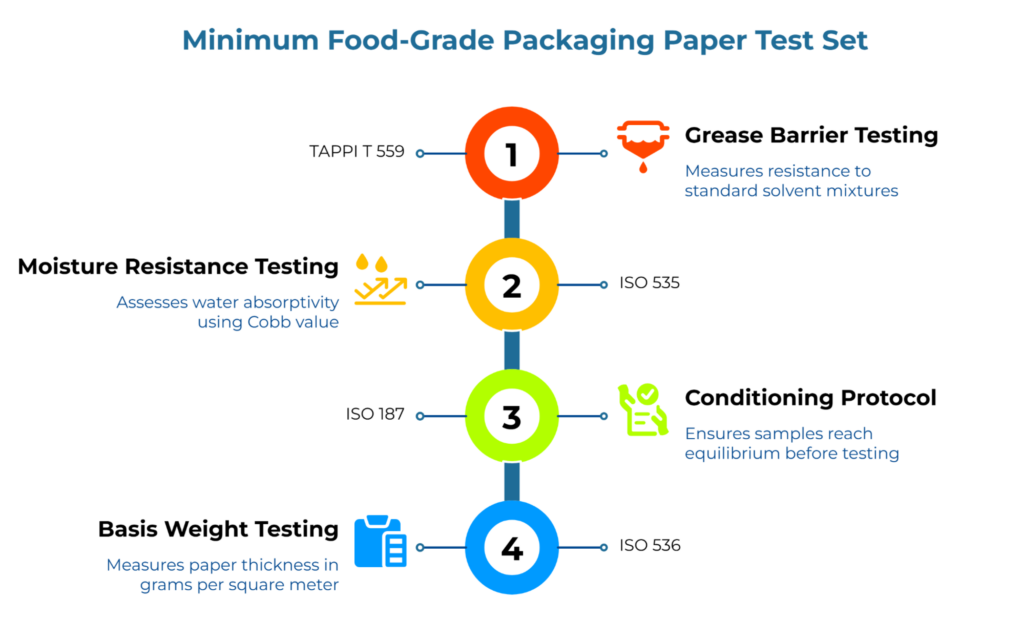
Test selection should be practical and defensible—explaining what risk each test covers rather than creating a jargon dump.
Grease barrier testing traditionally centres on the Kit test (TAPPI T 559), assigning ratings 1–12 based on resistance to standard solvent mixtures. However, because TAPPI T 559 was specifically designed for fluorochemical-treated papers, QA teams testing modern PFAS-free barriers must typically pair Kit results with extended fit-for-use trials to prevent false positives in field performance. As a general principle: Kit 1–4 suits dry items; Kit 5–7 handles moderate grease (typical for standard greaseproof paper); Kit 8–12 is typically required for high-fat, high-heat items. But laboratory testing alone doesn’t tell the whole story. A fit-for-use kitchen hold trial with actual food is also essential.
Kit Level is the component metric in the larger protocol. It measures grease resistance specifically—not complete wrapper performance. See food packaging paper kit levels 1–12.
Moisture and steam resistance uses Cobb value (ISO 535) to measure water absorptivity. Lower values mean better resistance. Conditioning protocol (ISO 187) ensures samples reach equilibrium before testing.
Handling strength starts with basis weight (ISO 536), measured in grams per square metre (GSM). Higher GSM generally means thicker paper—whether sourced from kraft paper suppliers or other manufacturers—but basis weight does not equal grease resistance. A 60 GSM paper with proper barrier treatment outperforms an 80 GSM paper without.
Risk → Evidence Mapping
| Risk the Menu Creates | What Tends to Fail | Evidence That Reduces Disputes |
| Hot fats + pressure | Grease-through, softening | TAPPI T 559 kit rating + kitchen hold trial notes/photos |
| Steam + long hold | Moisture soak, limp wrap | ISO 535 Cobb result + conditioning record (ISO 187) |
| Tight folds + compression | Tear initiation, seam failure | Basis weight (ISO 536) + targeted strength test as relevant |
| Drift between lots | Drift between lots | Sampling plan + incoming checks + traceability |
Which strength test matters depends on how the paper is used—tight folds versus loose wraps, hand-wrapping versus machine. The goal is to keep the test set minimal and defensible, not exhaustive.
Step 3 — Standardise Sampling and Conditioning
The goal is preventing supplier disputes and eliminating “non-repeatable lab numbers.”
Two Test Rhythms: Qualification vs. Incoming Checks
| Program Phase | Purpose | What It Looks Like |
| Qualification checks | Approve a paper for use on the highest-stress items | More complete test set + kitchen hold trial |
| Incoming checks | Catch drift or substitution | Fast screening + test method-confirming spot checks |
Qualification sampling evaluates new paper or suppliers by testing multiple lots before approval. Incoming inspection sampling verifies each delivery against the qualified baseline. Both catch drift—gradual changes as suppliers adjust formulations.
Conditioning protocol matters because paper properties change with humidity and temperature. ISO 187 generally specifies standard testing atmospheres of 23°C ± 1°C and 50% ± 2% RH, but crucially requires a preliminary pre-conditioning phase (typically between 10–35% RH) so that the paper reaches equilibrium through moisture absorption rather than desorption. Bypassing this step or running unconditioned tests creates disputes.
Comprehensive Verification: Each laboratory report must cross-reference the specific TAPPI or ISO method used, the pre-conditioning duration, and the lot-specific identification to ensure data defensibility during supplier audits.
Step 4 — Turn Test Results into Pass/Fail Acceptance Criteria
Setting thresholds from the stress profile means working backward from the Menu-Match Matrix. The highest-stress item sets the floor. If fried chicken needs Kit 8+ to survive a 15-minute hold, then Kit 8 is the minimum.
Acceptance criteria should come from the stress profile, not from universal numbers. The menu sets the bar.
Defining failure tiers creates clear decision rules.
Critical failures—grease-through staining outer packaging, structural collapse, odour transfer—trigger automatic rejection.
Functional failures—borderline results—trigger hold-for-review.
Cosmetic issues—colour variation, texture differences—get documented but typically accepted.
Context varies: what counts as “cosmetic” depends on brand presentation standards and customer expectations. The classification remains useful because it stops teams from treating every defect as equal.
Explore the PaperIndex Academy for more practical QA and sourcing guides.
Step 5 — Build an Audit-Ready Evidence Pack
Certificates are snapshots. They capture what was true on testing day. They don’t update when paper manufacturers change formulations.
Evidence Pack Checklist
- Declaration of Compliance (DoC) or Letter of Guarantee (LoG)
- Test reports with test method names, conditions, and results
- Sample identification linking reports to lots/batches
- Traceability records (lot numbers, production dates)
- Internal acceptance records
- Change notification agreements
- Review schedule
Review cadence: Monthly—spot-check incoming inspection data. Quarterly—review supplier certificates. Annually—full evidence pack audit.
A current evidence pack also improves procurement. It shortens supplier conversations because it makes requirements concrete.
Fast Field Checks: Receiving and Kitchen Trials
Field checks are not a substitute for lab methods. They are a safety net that catches obvious mismatches before they become routine failures.
Receiving screening happens before signing delivery acceptance. Visual inspection checks for damage or moisture exposure. An informal grease spot test using warm cooking oil can generally provide a quick, estimated 5-minute screening for gross defects, though it is not a standardized or repeatable laboratory method. See a simple 5-minute grease spot test.
The kitchen holds trials to validate performance with actual food. A simple, repeatable hold trial is often the most persuasive evidence because it speaks the language of service.
- Wrap the highest-stress item exactly as during service.
- Hold for the expected time (or a slightly longer internal standard).
- Apply typical handling—bagging, stacking, transport simulation.
- Record: time to first visible stain, softening at folds, tear initiation points, underside penetration.
If paper passes the highest-stress item, it handles the menu. Exact times and handling steps should align to the operation’s real workflow.
Common Protocol Mistakes (and How to Fix Them)
Mistaking GSM for grease resistance assumes thicker paper prevents grease-through. GSM measures weight, not barrier performance. Always specify barrier performance separately.
Testing wrong conditions versus real use invalidates results. Verify test conditions approximate actual use—heat at wrap, hold time, moisture, handling.
Not naming the test method creates confusion. “Kit Level 8 per TAPPI T 559, conditioned per ISO 187” tells exactly what was tested. (TAPPI)
Overbuilding the test program creates a system nobody runs. Start with the minimum set tied to the top three highest-stress items. Expand only when new failure modes appear.
Protocol Implementation Strategy
Start with the top three high-stress items. Build the Menu-Match Matrix for just those three. Once a working protocol exists for highest-risk items, extending to the full menu is straightforward.
Lock specifications and evidence requirements. Write down what’s needed: Kit Level minimum, GSM range, test methods, evidence checklist. Make it non-negotiable.
Add cadence and change triggers. Monthly: review inspection results. Quarterly: spot-check trials. Annually: full audit. The cadence prevents drift.
Resources
Related Guides from PaperIndex Academy
- Food Packaging Paper Kit Levels 1–12
- The Menu-Match Matrix for Food Packaging Paper
- Food Packaging Paper GSM Explained
- FDA vs. ISEGA for Takeout Food Packaging Paper
- A Simple 5-Minute Grease Spot Test
When ready to compare options, find suppliers on PaperIndex or submit your buying requirements to receive quotes directly.
Authority Sources
- Regulation (EC) No 1935/2004 — EU food-contact framework
- Regulation (EC) No 2023/2006 — EU GMP for food-contact materials
- 21 CFR Part 176 — U.S. food-contact paper regulations
- TAPPI — Standards body reference
Disclaimer:
This article provides general information about food-grade packaging paper testing protocols for educational purposes. Individual circumstances vary significantly based on factors like your local regulations, the exact food contact conditions (time, temperature, and food type), paper formulations and coatings, your handling and hold-time process. For guidance tailored to your kitchen’s specific risk profile and compliance needs, consult qualified food safety and packaging professionals.
Our Editorial Process:
Our expert team uses AI tools to help organize and structure our initial drafts. Every piece is then extensively rewritten, fact-checked, and enriched with first-hand insights and experiences by expert humans on our Insights Team to ensure accuracy and clarity.
About the PaperIndex Insights Team:
The PaperIndex Insights Team is our dedicated engine for synthesizing complex topics into clear, helpful guides. While our content is thoroughly reviewed for clarity and accuracy, it is for informational purposes and should not replace professional advice.